Hey all, Danny here and writing about my favorite army in 40K, Tyranids!

I’ve played Tyranids since they’ve existed, and well, I can be ok with them, but the problem is: They are mono-build. What does this mean? Almost every Tyranid list I write or pilot has at least 4 flyrants in it, and when I experiment, I often find myself wishing I had more flyrants, but this article will be how to make stronger tyranid lists that don’t just rely on having 5 flying death machines, so let’s get into it.
First off: Flyrants are generally necessary for a competitive Tyranid list. Why? They are our best HQ choice, our best mobile threat, and our most survivable Monstrous Creature (MC). Quite simply, they are the best thing we have. Our HQ slots are pretty weak, so if you aren’t taking Flyrants, you are relying on subpar HQ choices like either the super cheap Deathleaper (but you can only take 1) or a Tervigon (which isn’t bad, but is a bit too expensive for what it brings).
With that in mind, let’s look at what we can do:
The Endless Tide:
Endless Swarm Formation
3x 15 hormagaunts
2x 20 Termagaunts with 10 x devourers
1x 3 Tyranid Warriors
Tyranid CAD:
Tervigon with Electroshock Grubs – 205
Flyrant with Grubs, Devourers, Wings – 240 (Warlord)
2x 10 Termaguants
Lictor
2x 1 Malanthrope
2x Dimachaeron
2x Tyrannocyte
1850/1850
So this list is all about board control and target saturation. The Endless Swarm gives you a 4+ to respawn the Hormagaunts and the DevilGaunts (Termigaunts with devourers). You use the Hormies to rush up the table, to tie up enemies while also providing cover saves for your Dimachaerons (who are beasts in close combat). The Devilgaunts drop down in the tyrannocytes and lay out 30 strength 4, AP – shots and 10 strength 4, AP 5 shots. Once they die, they just recycle (hopefully). The Objective Secured Gaunts hide in the backfield with the Tervigon pooping out more if need be to send to the front lines to tie up deathstars or block objective stealers. The Malanthropes give cover saves and synapse, and the flyrant moves around providing some anti-air and some pinpoint damage when necessary.
This list wins on scenario, not damage, and in Kill Points, it is going to be a bad time. You won’t table anyone, but you will be able to control the flow of the game and the board pretty well with a lot of units with some coming back, and the Dimachaerons put out the pain in melee.
The biggest issue with this list besides Kill Points? It is a lot of models, including some harder to get Forgeworld models, and so hobby-time, cash, and game time are at a premium here cause this list will hoover it all up. You will have to learn to play fast with so many models, and sadly, Eldar Jetbike spam still pump out enough shots to really thin the herd before they get there. You can drop a Dimachaeron to really pump up the Hormies, but then you lack a solid beat stick.
Surprise Bugs!
Tyranid CAD:
Deathleaper (Warlord)
3x Rippers with Deepstrike
3x Rippers with Deepstrike
3x Rippers with Deepstrike
3x 1 Lictor
3x Mawloc
Fortification: Plasma Obliterator
Tyranid CAD
Tyranid Prime
2x 3 Rippers with Deepstrike
3x 1 Lictor
3x Mawloc
1850/1850
So this is a strange, oddball list, but it is essentially a null deploy Tyranid list with one big anchor unit. You can infiltrate the Lictors or deepstrike them, and depending on terrain, you may want to infiltrate 1 or 2 Lictors out of LoS to act as turn 2 beacons for the Mawlocs. The Mawlocs simply pop up and gobble whatever they can, and you can use the Lictors as either beacons or as pinpoint objective grabbers while the Rippers are Obsec with deepstrike, making them ideal for suddenly capturing far away objectives or contesting. The Tyranid Prime (when have you seen one of those?) goes inside the Plasma Obliterator, giving you BS4 with it in an AV14 building, and the important thing here is that it needs to go in the corner of your deployment to keep D-weapons away from it and limit how many drop meltas can get within range, and with its own 72” range, it can still reach out and impact the game while hiding.
This is a strange, strange list, but it plays scenario really well, and it gives you one big, heavy hitting shooting weapon to rain death while you have a lot of unexpected angles. If you play smart, you can win on scenario while also doing a fair bit of damage if your scatters are kind.
It has two big weaknesses though: Drop-Melta will likely table you turn 1 and again, it gives up a lot of kill points. That said, this is a Bug list that few will expect, and if you are good with the modeling skills, you can make a pretty kick-ass Tyranid Plasma Obliterator. It also has issues with synapse, so the rippers will likely eat themselves, but they are there to grab you objectives and then just die. Against deathstars, it has enough units to simply start tying them up, keeping them from being able to win on scenario.
This is a high skill cap list, meaning that you cannot make a lot of mistakes, and you absolutely have to know the missions you are playing well, but in the hands of a savvy general, it can be pretty devastating, especially to some of the more common power-builds like Eldar Jetbike spam or Dark Angels Black Knights. It also expensive as 6 Mawlocs aren’t cheap.
Melee Bugs (wait what?!)
Tyranid CAD:
Tervigon
17x Hormagaunts
15x Hormagaunts
3x Dimachaeron
3x Tyrannocyte
Sky-Tyrant Swarm
Hive Tyrant with Rending claws, Wings, Electroshock Grubs
2x 10 Gargoyles
Sky-Tyrant Swarm
Hive Tyrant with Rending claws, Wings, Electroshock Grubs
2x 10 Gargoyles
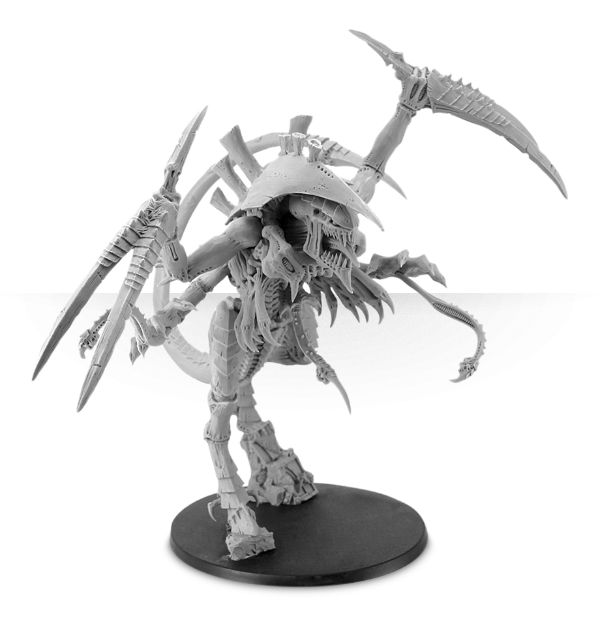
So this list is really a 2 wave slug fest, meant to get into your opponent’s face and claw it as hard as the bugs can (which admittedly, is not very hard). The Sky-Tyrant Swarm lets you make a big unit of 20 Gargoyles with a Flyrant, giving him 20 ablative wounds but also forcing him to stay gliding. With 2 Flyrant-led death squads and 2 medium sized Hormie squads marching up the field, it will take a lot of firepower to whittle them away before the Dimachaerons drop in and start pressuring the backfield. The Tervigon exists to poop out Termagaunts to help you control your own backfield, and overall, this is a much more rush forward and kill list but also with 5 psychic levels (hope for Feel No Pain and Scream). The Hormies can even be used to tie up deathstars for a turn or 2 as Tyranids struggle with Thunderwolves, Bikestars, and any other heavy hitting unit as we don’t have the invul saves to really be able to compete.
The biggest problems here? It doesn’t do damage until turn 2 or 3 at the earliest, and at the end of the day, bugs don’t fight that well. Still, this is a melee centered army that can do a good bit of damage but relying on the fact that most people forget a Tyrant is WS8 with 5 attacks (6 on the charge) at Initiative 5. You could cut points to give them boneswords and/or lashwhips, which may be a good call if you expect to see a lot of riptides as the instant death is very nice. I like having the Hormies though as deathstars are common, and you need some chumps to throw to the wood chipper.
So here we are, three very different Tyranid lists that aren’t just Flyrant spam. Each list here has major weaknesses, but that’s also true of the Flyrant spam, but the advantage to these is that few people will expect these kinds of builds, and a savvy general will capitalize on this.
So if you want to play bugs but don’t want to just run the usual flyrant spam, if you can, give these a whirl and see how it goes for you.
Or if these sound terrible, try my standard bug list:
Leviathan Detachment:
3x Flyrant (Wings, 2x Devourers, Electro)
Mucolid Spore
10x Termagaunts
12x Termagaunts
Mawloc
Tyranid CAD:
2x Flyrant (Wings, 2x Devourers, Electro)
2x Mucolid Spore
Broodkin CAD
Magnus
Patriarch
Disciples
Faithful Throng
This list packs 14 psychic levels, 1 guaranteed Shriek (2 once the FAQ becomes official), 4 obsec units for the backfield, 1 mawloc for threatening objective campers, and 5 flyrants to rain death. For me, this is still the best Tyranid list I run since it has the most options against the top armies. The Flyrants and Mawloc are good against Eldar, the psychic powers are good against Tau, I have enough bodies to slow down Battle Company (but this is the toughest matchup), I have more bodies to play scenario against Superfriends, and I have enough haywire to threaten Knights.
But hey, I’ll buy any person a beer who goes undefeated at a tourney with bugs, and I’ll buy 2 rounds if they can do so without having more than 2 Flyrants in their list. I’ll also ask him/her to teach me his/her ways.

